If you're a beginner looking for a straightforward yet powerful guide to getting started with GoHighLevel, you're in the right place.
After using GoHighLevel for over 4 years, I understand how overwhelming it can feel when you're just starting – figuring out how to connect A to B and make it all work.
That's why I’ve poured my years of experience into this guide. I’ll walk you through what each feature does, how to use it, and everything you need to know to get started the right way.
By the time you finish this guide, you won’t need any other tutorial on “GoHighLevel Walkthrough.” I’ve got everything covered for you right here.
Key Takeaways:
- GoHighLevel combines essential tools like CRM, marketing automation, and funnels in one place, simplifying your workflow.
- With step-by-step guidance, you can easily set up your account, manage clients, and launch campaigns without technical expertise.
- Automation, templates, and integrations streamline your processes, allowing you to focus more on growing your business.
No junks – let's get into it!
GoHighLevel for Walkthrough – Account Setup
The first thing to do as a GoHighLevel beginner is to create an account with Go High Level and every other thing will follow.
Here's how to set it up:
Step 1: Creating Your GoHighLevel Account
Since you will be setting up your account – you should do that for FREE!
Luckily, you can get a 30-day free trial here.
To start, go to GoHighLevel.com/30-day-trial and you will be redirected to the page below.
![What is GoHighLevel? [A User Experience] 6 GoHighLevel 30 Day Trial Home Page](https://theolaoye.com/wp-content/uploads/2024/11/GoHighLevel-30-Day-Trial-Home-Page.jpg)
Click on “30-Day Free Trial” and you will be asked basic information about your business, such as:
- Company Name
- Full Name
- Phone Number
- Email Address
![What is GoHighLevel? [A User Experience] 7 GoHighLevel 30 Day Trial Home Page 2](https://theolaoye.com/wp-content/uploads/2024/11/GoHighLevel-30-Day-Trial-Home-Page-2.jpg)
Upon filling in everything, click on “Go To Step #2” where you will be asked to select the plan you want.
For now, you need to Select the GoHighLevel Unlimited Plan and you will be able to upgrade or downgrade later.
You will be asked to input your credit card details next – you will not be debited anything until the end of your trial.
After that, the next is, the onboarding process.
Step 2: GoHighLevel Onboarding
Once you finish the steps above, Go High Level will ask you some onboarding questions to ensure that your account is well set up.
Let’s take a look at them!
The first thing is to tell GHL more about your business, you would need to:
- Select the industry you operate in
- The primary purpose of using GoHighLevel
- The number of your customers
- And if you have a website
Supply the information based on what is right for you.
![What is GoHighLevel? [A User Experience] 8 GoHighLevel Onboarding Process Stage 1](https://saaspen.com/wp-content/uploads/2024/08/gohighlevel-onboarding-1-1024x493.jpg)
If anything isn’t clear to you now, select anything and continue because you can always change it later.
The next page will ask for your business address and billing information.
Then, you need to specify if you’re willing to resell GoHighLevel or not.
Reselling GoHighLevel means that you can resell the entire platform on your name – at your prices and keep the balance.
![What is GoHighLevel? [A User Experience] 9 GoHighLevel Onboarding Process Stage 2](https://saaspen.com/wp-content/uploads/2024/08/gohighlevel-onboarding-2-1024x498.jpg)
Just fill in the blank as you can see above and proceed to the next stage.
![What is GoHighLevel? [A User Experience] 10 GoHighLevel Onboarding Process Stage 3](https://saaspen.com/wp-content/uploads/2024/08/gohighlevel-onboarding-3-1024x516.jpg)
If you take a closer look at the image above, you will see that it’s asking you to select the tools you currently use.
Selecting the tools is going to keep you organized under one single dashboard.
So, select all that apply and proceed to the next stage.
And if you have none for now, just click on “Next ->“
![What is GoHighLevel? [A User Experience] 11 GoHighLevel Onboarding Process Stage 4](https://saaspen.com/wp-content/uploads/2024/08/gohighlevel-onboarding-4-1024x510.jpg)
So, the next stage will ask you to set up your password and a code will be sent to your email for confirmation.
Input the code and you will have the page below which confirms that your GoHighLevel account has been created.
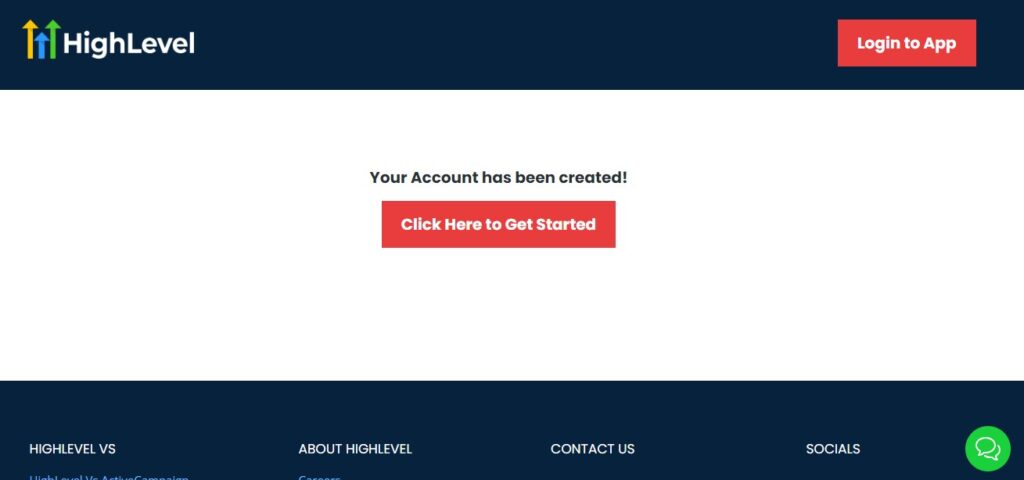
I want to say congratulations, you have just set up your HighLevel account.
Now, you have access to your dashboard which looks like the image below.
![What is GoHighLevel? [A User Experience] 12 GoHighLevel Agency Dashboard](https://saaspen.com/wp-content/uploads/2024/08/GoHighLevel-Agency-Dashboard-1024x463.jpg)
The dashboard above is because I am in Agency Mode, which means that if I want to resell GoHighLevel if I am not reselling, this is what it will look like below.
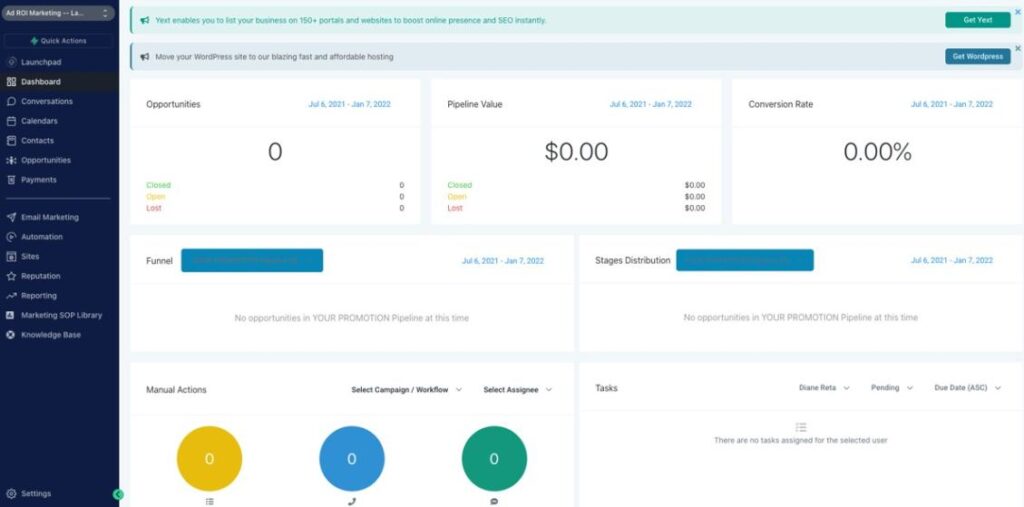
Now, for the sake of this tutorial and because you're a beginner we will be focusing on the second dashboard.
This is what you need for now – once you understand that which is the basics, then you can operate every other feature on GoHighLevel.
Now, at the left-hand side of your screen – these are the options you have below:
- Launchpad
- Dashboard
- Conversations
- Calendars
- Payments
- Marketing
- Automation
- Site
- Membership
- Media Storage
- Reputation
- Reporting
- App Marketplace
- Settings
I will break down each feature to the last details in subsequent paragraphs.
1. Launchpad
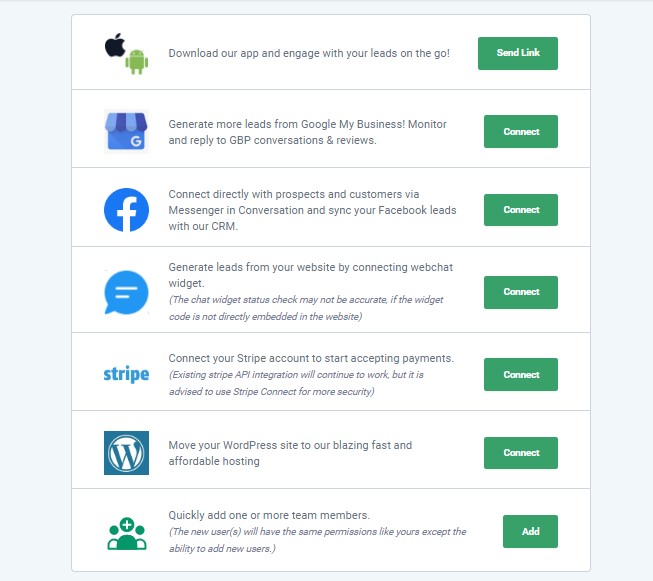
The Launchpad is your starting point in GoHighLevel, offering a centralized hub to get up and running quickly.
What You Can Do with Launchpad:
- Connect your business tools, such as your Google My Business profile, social media accounts, and email provider.
- Set up your branding, including your logo and contact details.
- Manage your business phone number and integrate text messaging.
- Access quick links to essential features like reputation management and email marketing.
- Monitor your setup progress with a checklist for guidance.
How to Use the Launchpad
To get started with the Launchpad, begin by linking your essential business tools.
Navigate to the Launchpad tab from the left-hand menu, where you'll find options to connect your Google and Facebook accounts.
These integrations are vital for managing your online presence and syncing tools like reviews and social media scheduling.
Simply follow the prompts provided, such as logging into your accounts and authorizing access.
Next, customize your business details. Upload your business logo, input your contact information, and ensure everything reflects your brand accurately.
You’ll find these options under the “Business Info” section in the Launchpad.
This personalization ensures that your branding is consistent across all communications and tools.
Finally, focus on completing the checklist at the bottom of the Launchpad.
This checklist serves as your roadmap, guiding you through key setup tasks like creating pipelines, adding team members, or activating automation.
It’s a step-by-step process designed to help you get the most out of GoHighLevel from day one.
Tips to Get the Best Out of Launchpad:
- Start by connecting your Google My Business profile to improve your visibility online and sync reviews.
- Keep your branding consistent by uploading high-quality logos and correct business details.
- Regularly check the setup checklist to ensure nothing critical is overlooked during onboarding.
- Use the messaging integration early on to familiarize yourself with client communication tools.
- Take advantage of the shortcuts provided in Launchpad to explore other features like conversations and marketing without feeling overwhelmed.
The Launchpad ensures you start with a strong foundation. By connecting key tools and completing setup tasks, you’ll save time and set yourself up for success across GoHighLevel’s other features.
2. Dashboard
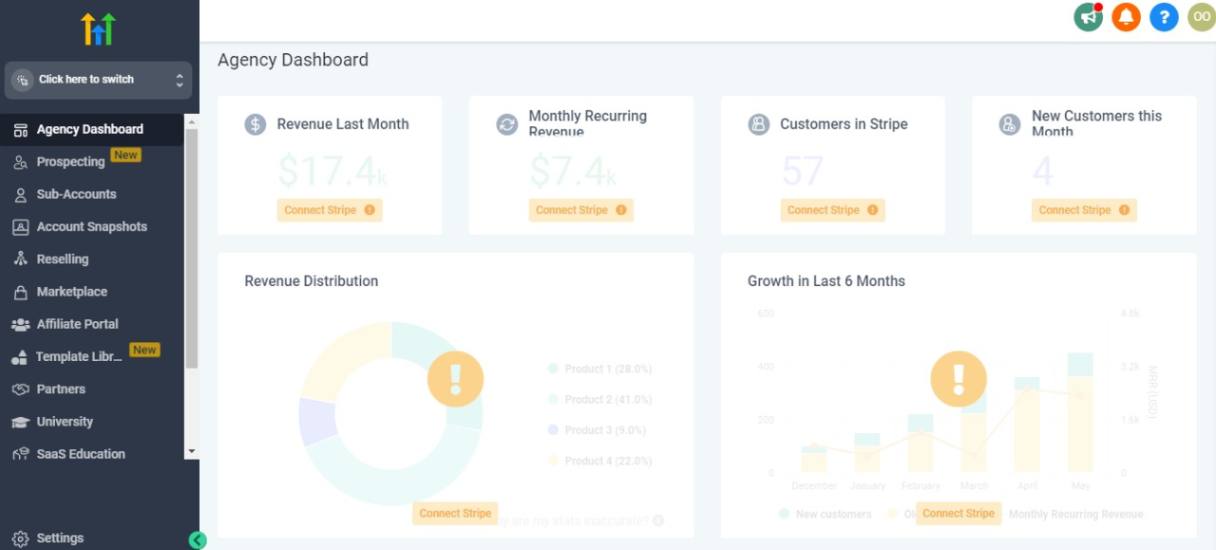
The Dashboard in GoHighLevel gives you an at-a-glance overview of your business performance and activities, making it easy to stay on top of everything.
What You Can Do with the Dashboard:
- View real-time data on leads, pipeline value, and conversion rates.
- Track appointments, tasks, and upcoming events in one place.
- Access an overview of recent activities like new leads or client communications.
- Monitor key metrics, including email campaign performance and website stats.
- Quickly jump to other features using shortcuts available on the dashboard.
How to Use the Dashboard
When you first log into GoHighLevel, the Dashboard is your main hub for insights.
The top section typically displays metrics like pipeline value, leads, and conversion rates. Use these numbers to evaluate how your business is performing at a glance.
Below, you'll find sections for appointments and recent activities.
This is where you can track scheduled meetings, tasks, and communication logs. You can click on individual entries to dig deeper into the details or manage your schedule directly from here.
Additionally, shortcuts on the dashboard allow you to navigate quickly to other tools, such as campaigns, workflows, or settings.
Make it a habit to scan the dashboard daily to ensure you're updated on key metrics and priorities.
Tips to Get the Best Out of the Dashboard:
- Customize your dashboard layout, focusing on the metrics that matter most to your business.
- Review the pipeline value and conversion rates weekly to identify trends and areas for improvement.
- Use the appointments section to stay on top of meetings and avoid double bookings.
- Check recent activities daily to ensure all leads and client communications are accounted for.
- Make it part of your routine to start each day with a quick dashboard review to prioritize tasks.
The Dashboard provides a bird's-eye view of your business operations, helping you stay informed and make data-driven decisions. By using the dashboard effectively, you can identify opportunities, manage priorities, and ensure nothing slips through the cracks.
3. Conversations
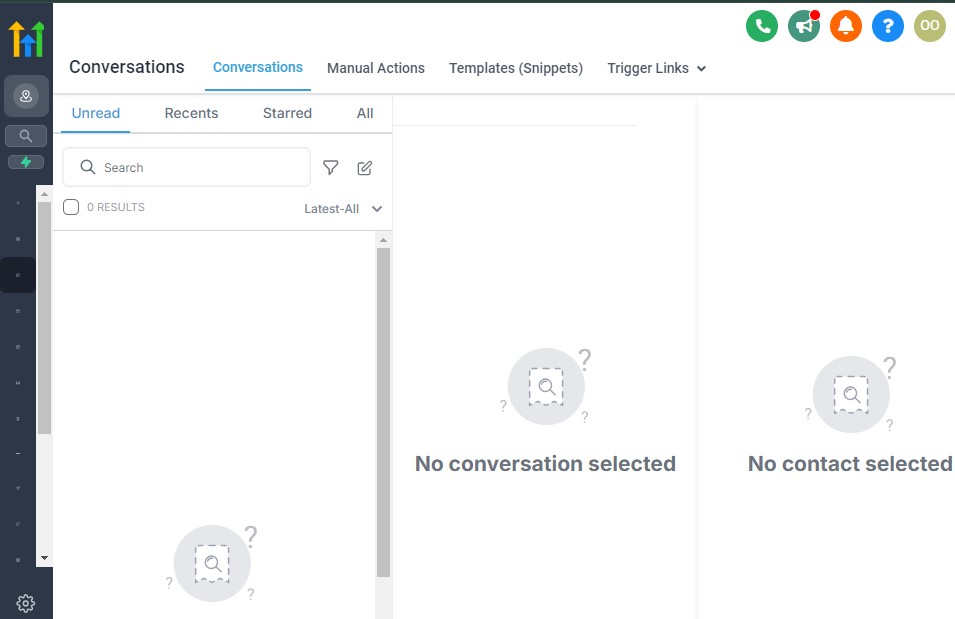
The Conversations feature is where all your client interactions come together.
It acts as a unified inbox for managing messages across multiple channels like SMS, email, Facebook Messenger, and more.
What You Can Do with Conversations:
- View and respond to messages from SMS, email, and social media in one place.
- Manage ongoing chats and follow up with clients or leads seamlessly.
- Access conversation history to stay informed on past interactions.
- Send quick replies, templates, or attachments for faster communication.
- Organize conversations by status, such as “Open,” “Closed,” or “Pending.”
How to Use Conversations
To start using the Conversations feature, navigate to the “Conversations” tab in the main menu.
Here, you’ll find a unified inbox displaying all incoming messages. Each conversation is tagged with the source (e.g., SMS, email, or Facebook Messenger), so you know where it’s coming from.
You can open any message thread to respond directly. Use quick reply templates or compose personalized messages to keep the conversation flowing.
If you need to share files or media, there’s an option to attach them easily within the thread.
Additionally, the search bar allows you to locate specific conversations by name, keyword, or date.
To stay organized, update the status of conversations (e.g., mark them as “Closed” once resolved). This keeps your inbox clutter-free and helps prioritize active leads.
Tips to Get the Best Out of Conversations:
- Enable notifications for new messages to ensure you respond promptly.
- Use templates for frequently asked questions to save time and maintain consistency.
- Segment conversations by tags or filters to stay organized and prioritize leads.
- Always review conversation history before replying to maintain context and professionalism.
- Integrate multiple communication channels (e.g., Facebook Messenger and email) to centralize all client interactions.
The Conversations feature simplifies communication by consolidating multiple channels into one space. This saves you time and ensures you never miss a message, helping you build stronger relationships with leads and clients.
4. Calendars
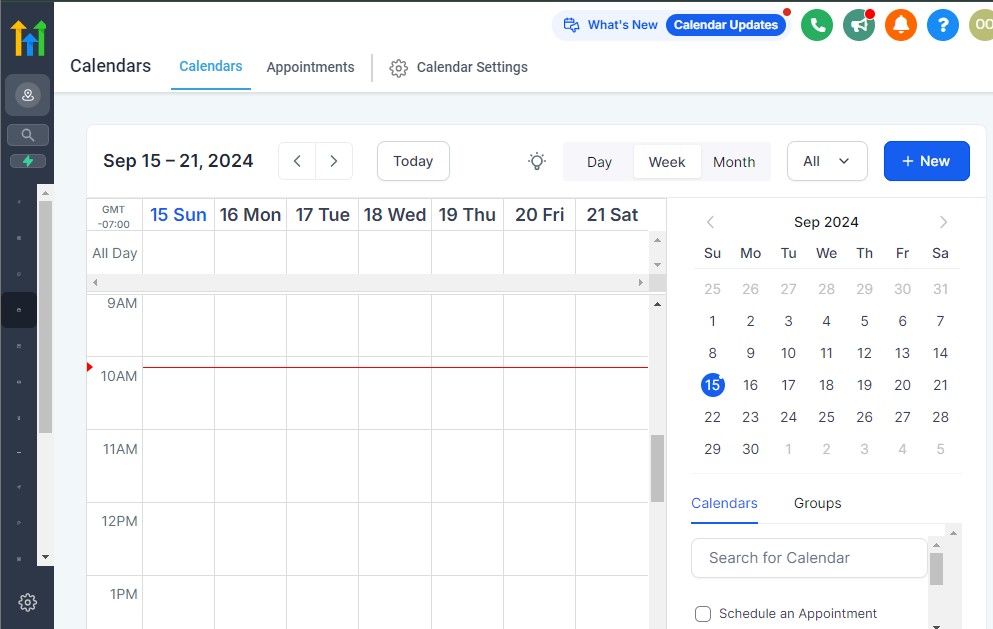
The Calendars feature in GoHighLevel allows you to manage appointments, streamline scheduling, and ensure your time is organized for maximum productivity.
What You Can Do with Calendars:
- Schedule and manage appointments for yourself, your team, or clients.
- Share booking links with clients to let them book directly based on your availability.
- Set up multiple calendar types (e.g., team calendars, one-on-one bookings, or group events).
- Sync with Google Calendar to keep your schedule updated across platforms.
- Automate reminders and notifications for upcoming meetings.
How to Use Calendars
To start, navigate to the “Calendars” tab in GoHighLevel. Here, you can create custom calendars tailored to your needs.
Begin by setting your availability, including your working hours, buffer times between appointments, and any days off.
Once your calendar is set up, generate a booking link to share with clients.
This link allows them to view your availability and book appointments without the back-and-forth of manual scheduling.
If you manage a team, you can create a group calendar to distribute bookings evenly among team members.
Integrating your Google Calendar is also highly recommended.
This ensures all your appointments from GoHighLevel sync automatically, reducing the risk of double-booking.
Additionally, use the reminder settings to automate email or SMS notifications for both you and your clients.
Tips to Get the Best Out of Calendars:
- Always block out personal or unavailable times in advance to prevent overlapping bookings.
- Customize your booking link with branding, such as your logo and business name, to maintain professionalism.
- Use buffer times to give yourself breathing room between meetings and avoid back-to-back stress.
- Automate reminders to reduce no-shows and improve client punctuality.
- Regularly check your calendar for updates or changes to avoid surprises in your schedule.
Calendars streamline the scheduling process, saving you and your clients valuable time. By automating reminders and centralizing appointment management, you can focus on delivering great service while ensuring your schedule stays organized.
5. Payments
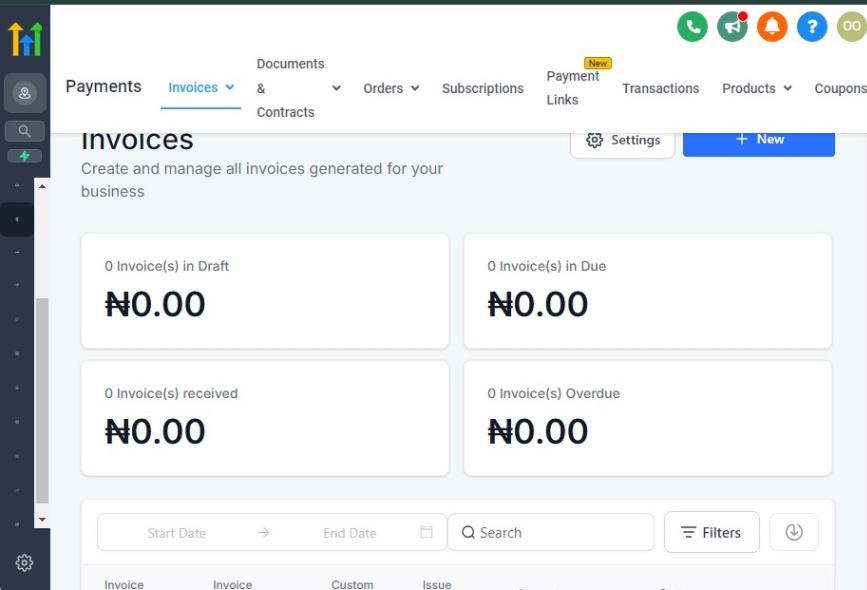
The Payments feature in GoHighLevel simplifies how you collect and manage payments from your clients, making transactions seamless and professional.
What You Can Do with Payments:
- Collect payments directly through invoices or via online payment links.
- Integrate popular payment gateways like Stripe or PayPal for secure transactions.
- Automate recurring payments for subscription-based services.
- Track payment statuses (e.g., Paid, Pending, Overdue) to stay organized.
- Generate invoices and customize them with your business branding.
How to Use Payments
To start using the Payments feature, integrate your preferred payment gateway like Stripe or PayPal under the “Settings” section of GoHighLevel.
Once connected, you can create invoices directly from the “Payments” tab.
When creating an invoice, you’ll be prompted to add details like the client’s name, service description, and payment amount.
Customize the invoice with your logo and business details to give it a professional touch. After finalizing, you can send the invoice to the client via email or text, complete with a secure payment link.
If you offer recurring services, set up subscription payments to automate billing and ensure consistent cash flow.
Payments are tracked automatically, and you can monitor the status of each transaction from the dashboard to follow up on unpaid invoices promptly.
Tips to Get the Best Out of Payments:
- Always double-check your payment gateway integration to ensure smooth transactions.
- Use automated reminders for overdue invoices to maintain timely payments.
- Customize invoices with clear descriptions of services to avoid client confusion.
- Take advantage of recurring payments for subscription-based or retainer services.
- Monitor your payment dashboard regularly to track income and identify trends.
Payments streamline your billing process, reducing the time and effort spent on manual invoicing. By integrating secure gateways and automating recurring payments, you create a seamless experience for both your business and your clients, boosting efficiency and professionalism.
Learn More:
- What is GoHighLevel? [A User Experience]
- GoHighLevel Features: Complete List
- GoHighLevel Integrations
- GoHighLevel Pricing: (Costs Breakdown)
- Is GoHighLevel a CRM?: (Find Out Here💡)
- Is GoHighLevel Legit?: (Find Out Here 💡)
- Is GoHighLevel Worth It? (Find Out Here 💡)
- 15+ GoHighLevel Benefits: (Why You Need It)
6. Marketing
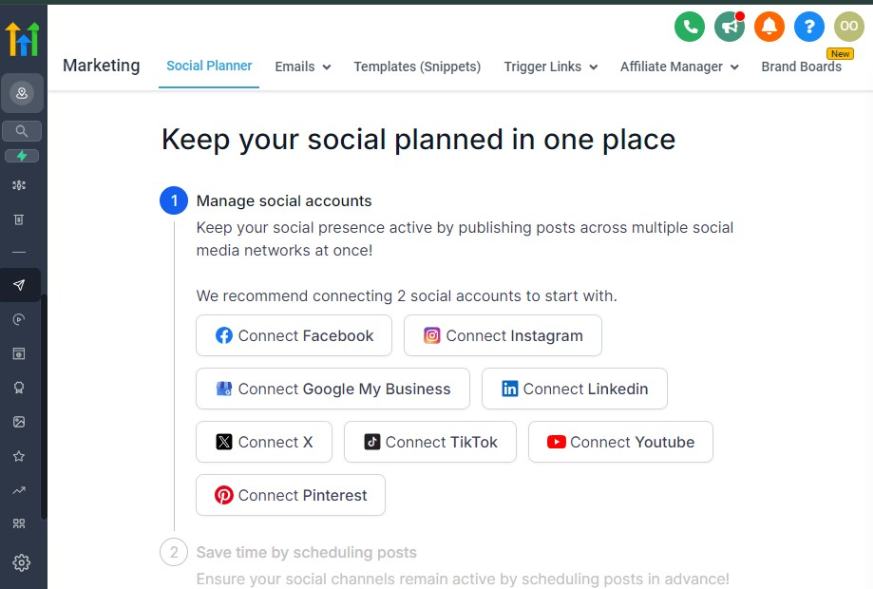
The Marketing feature in GoHighLevel is your all-in-one tool to create, manage, and optimize your marketing campaigns across multiple channels.
What You Can Do with Marketing:
- Build and launch email, SMS, and social media campaigns.
- Use pre-designed templates or create your own to customize campaigns.
- Segment your audience for targeted messaging and better results.
- Track the performance of your campaigns with analytics and reports.
- Automate follow-ups to nurture leads and clients without manual effort.
How to Use Marketing
To begin using GoHighLevel's Marketing feature, navigate to the “Marketing” tab. From here, you can choose to create campaigns for email, SMS, or social media.
If you’re starting with email, click on “Create Campaign” and either select a pre-designed template or start from scratch.
You can easily drag and drop elements, such as images, buttons, and text, to create visually appealing emails.
Once you’ve crafted your message, you can segment your audience based on criteria like interests, behaviors, or demographic details.
This allows you to send highly relevant content to specific groups, increasing engagement and conversions.
To maximize the effectiveness of your campaigns, set up automation. For example, if a lead clicks on a link in your email, you can automatically send a follow-up message or add them to a new campaign.
After launching, use the built-in analytics to track your campaign’s performance. Monitor key metrics like open rates, click-through rates, and conversions to refine your strategy over time.
Tips to Get the Best Out of Marketing:
- Always test your emails or SMS messages before sending to ensure they look good on all devices.
- Use segmentation to tailor your messages to different audience groups for better engagement.
- Set up automated follow-ups for leads who haven’t responded or clicked, keeping them in your sales funnel.
- Regularly check your campaign analytics to identify which messages are working and adjust as needed.
- Use A/B testing to try different subject lines, copy, or offers to see what resonates best with your audience.
The Marketing feature allows you to manage all your promotional activities in one place. By automating tasks like follow-ups and using segmentation, you can save time while delivering highly personalized, impactful campaigns that drive conversions and business growth.
7. Automation
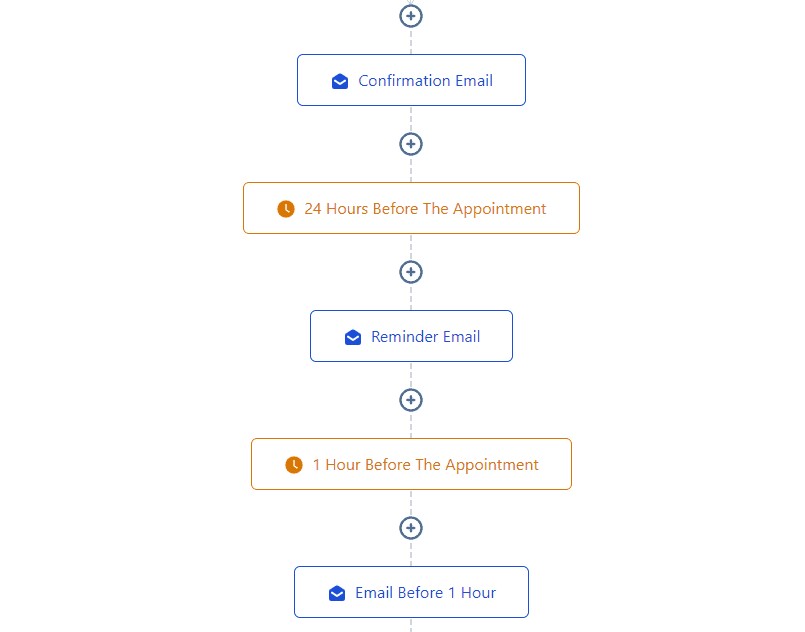
The Automation feature in GoHighLevel helps you set up workflows to automate repetitive tasks, saving you time and ensuring consistent, efficient processes.
What You Can Do with Automation:
- Create automated workflows for lead nurturing, client follow-ups, and task assignments.
- Set triggers based on client behavior (e.g., form submission, website visit).
- Automatically send emails, SMS messages, or task reminders.
- Manage and track the performance of your automations with detailed analytics.
- Integrate automations with other GoHighLevel features, such as marketing, payments, and conversations.
How to Use Automation
To start using the Automation feature, go to the “Automation” tab and click on “Create Workflow.”
You can choose to start from scratch or use one of the available templates that fit your needs, such as a welcome sequence or a follow-up reminder.
When setting up your workflow, define the trigger event. For example, if a lead fills out a form on your website, this can trigger an automated email to welcome them and offer additional information.
You can add multiple steps to a workflow, including email or SMS messages, task assignments, or even setting a specific status in the conversation thread.
Once your workflow is set up, you can test it to make sure everything runs smoothly.
Afterward, you can monitor the performance of each automation through detailed reports to see how many leads were nurtured, how many messages were sent, and the results achieved.
Tips to Get the Best Out of Automation:
- Start with simple automations, like lead nurturing emails or welcome messages, to get a feel for the system.
- Segment your audience before automating messages to ensure your content is relevant and personalized.
- Use conditional logic in workflows to tailor messages and actions based on the lead’s behavior or status.
- Regularly monitor automation performance to ensure that workflows are running smoothly and efficiently.
- Combine automation with other features, such as marketing campaigns and conversations, for a fully integrated experience.
Automation saves you significant time by handling repetitive tasks, allowing you to focus on growing your business. By automating lead nurturing and client communication, you can ensure consistency in messaging and improve customer satisfaction while boosting productivity.
8. Site
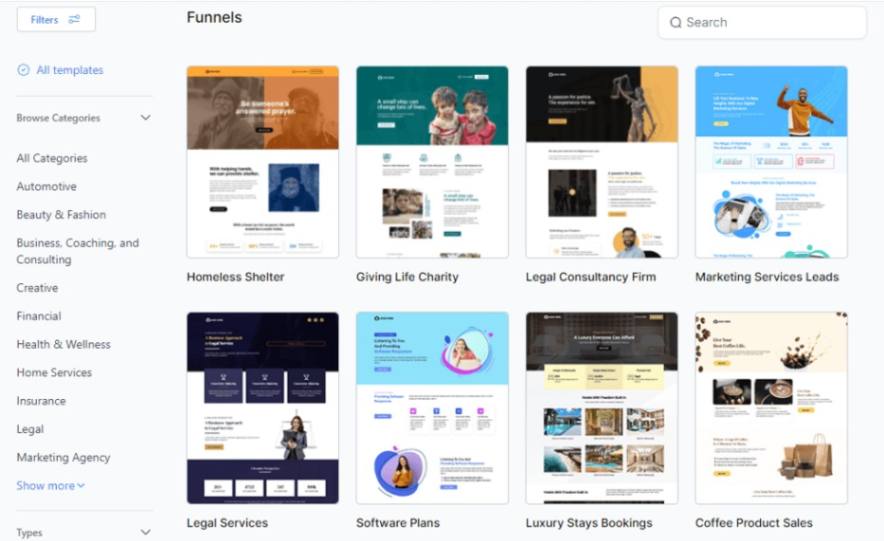
The Site feature in GoHighLevel enables you to create and manage professional websites without the need for advanced technical skills.
What You Can Do with the Site:
- Build custom websites using drag-and-drop elements.
- Use pre-designed templates or create a completely unique site.
- Optimize websites for mobile devices to ensure a responsive design.
- Integrate lead capture forms to collect client information directly from your site.
- Track site performance with built-in analytics and reporting.
How to Use Site
To begin using the Site feature, go to the “Sites” tab in your GoHighLevel dashboard.
From there, you can either choose a template to customize or create a new site from scratch.
If you opt for a template, select one that fits the purpose of your site, whether it’s for lead generation, product promotion, or client onboarding.
Once you’ve selected a template or decided to build from scratch, use the drag-and-drop editor to add elements like images, text blocks, buttons, and forms.
You can customize the design by adjusting fonts, colors, and layout to match your branding.
If you want to capture leads, drag a form element onto the page and connect it to your CRM to automatically add new contacts.
You can also set up automated follow-ups for form submissions through workflows.
Once your site is live, use the built-in analytics to track metrics such as traffic, bounce rates, and form submissions.
This data can help you understand how visitors are interacting with your site and identify areas for improvement.
Tips to Get the Best Out of Site:
- Always preview your site on both desktop and mobile views to ensure it’s responsive.
- Use strong call-to-action buttons (CTAs) to guide visitors toward completing desired actions, such as booking an appointment or filling out a contact form.
- Optimize site speed by keeping images compressed and minimizing unnecessary scripts, ensuring a smooth user experience.
- Integrate your site with other GoHighLevel features, such as automation and payment systems, to create a seamless user journey.
- Regularly check your site analytics to identify areas where visitors may be dropping off or engaging more, and optimize accordingly.
The Site feature in GoHighLevel provides you with an easy, no-code solution to creating a professional online presence. Whether you need a landing page, a full website, or a lead capture form, GoHighLevel simplifies the process, helping you generate leads and grow your business without the hassle of technical development.
9. Membership
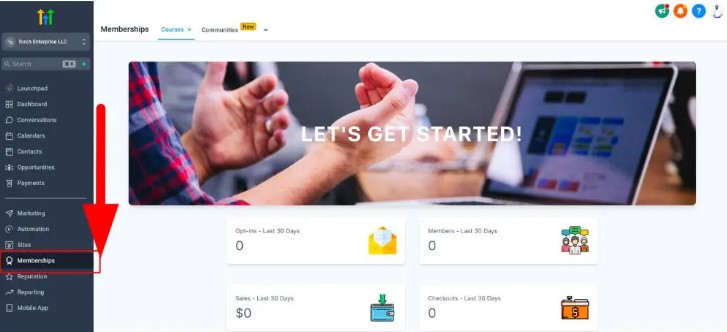
The Membership feature in GoHighLevel allows you to create and manage member-based content, ideal for delivering exclusive content, courses, or digital products to your clients.
What You Can Do with Membership:
- Build and manage membership sites for your clients.
- Create gated content that only members can access.
- Organize content into modules or lessons for structured delivery.
- Offer a subscription-based model for recurring revenue.
- Track member progress and engagement with your content.
How to Use Membership
To get started with the Membership feature, go to the “Membership” tab in your GoHighLevel dashboard.
From there, click “Create Membership” to begin. You’ll be prompted to set up a membership site, where you can upload content, such as videos, documents, or courses.
You can create modules or lessons to organize the content in a logical, easy-to-follow way. For instance, you might have a “Getting Started” module, followed by more advanced lessons or content that users can unlock after completing earlier ones.
Once the content is uploaded and organized, you can set access permissions. This ensures only members who have subscribed or been granted access can view the content.
You can also set up a subscription model, so members are billed automatically on a recurring basis, ensuring consistent revenue.
To manage members, use the dashboard to track their progress, check which content they have accessed, and send them automated reminders or updates.
Tips to Get the Best Out of Membership:
- Offer a free trial period or a sneak peek of your content to attract new members.
- Use gamification elements, such as progress bars or certificates, to engage members and motivate them to complete courses.
- Regularly update your content to keep it fresh and valuable, ensuring members stay subscribed.
- Set up email or SMS automations to notify members about new content or updates.
- Consider offering tiered memberships with different levels of access to exclusive content or perks.
The Membership feature is powerful for building a steady stream of revenue through subscriptions, while also giving you a platform to deliver high-value content to your clients.
10. Media Storage
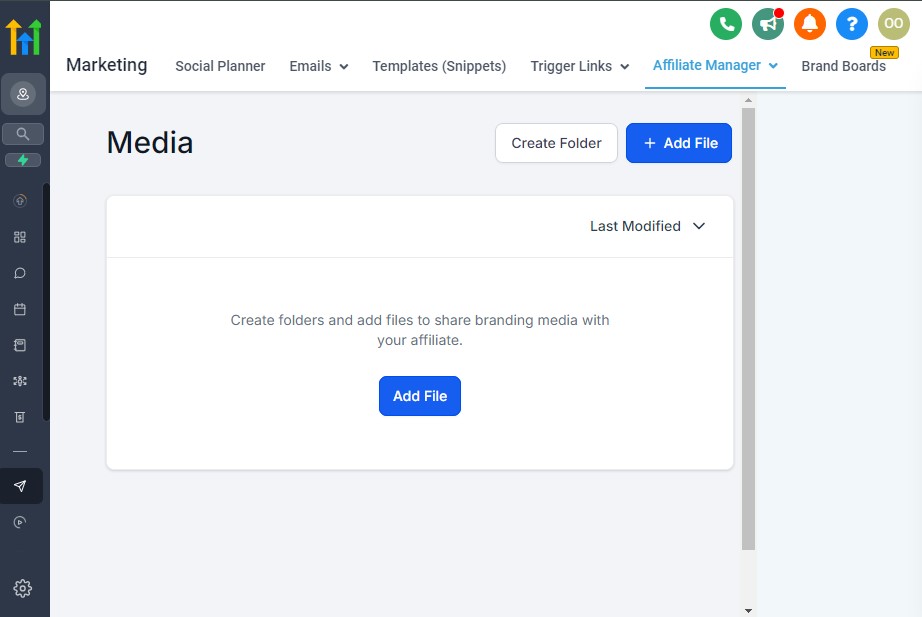
The Media Storage feature in GoHighLevel allows you to securely store and manage your images, videos, documents, and other media files in one centralized location.
What You Can Do with Media Storage:
- Upload and store images, videos, audio files, and documents.
- Organize files into folders for easy access and management.
- Use stored media across different campaigns, automations, and websites.
- Share media links directly with clients or team members.
- Securely manage and back up important media files.
How to Use Media Storage
To start using the Media Storage feature, go to the “Media” tab in your GoHighLevel dashboard.
From here, you can upload media files by dragging and dropping them or using the “Upload” button. Choose the files you want to store, whether they are images, videos, or documents.
Once uploaded, you can organize your files into folders for easy access.
For example, you might create separate folders for marketing materials, client documents, and website assets. This keeps everything organized and reduces time spent searching for files.
After your media is stored, you can easily insert it into campaigns, websites, or automations. Simply select the media you need and insert it wherever required.
Additionally, you can share links to files with clients or team members for collaboration.
Tips to Get the Best Out of Media Storage:
- Keep your media organized by creating specific folders based on categories like campaigns, assets, or clients.
- Compress large files (especially videos) to save storage space and improve load times when used in campaigns.
- Regularly back up important media to avoid losing valuable files.
- Use descriptive file names and tags to make searching easier.
- Use the media in your marketing campaigns and automation for a more dynamic client experience.
The Media Storage feature provides a central, organized place to keep all your important files. Whether you need images for your website or videos for marketing campaigns, having everything stored in GoHighLevel ensures seamless access and management, saving you time and reducing the risk of losing files.
11. Reputation
The Reputation feature in GoHighLevel helps you manage and improve your online reputation by gathering reviews and monitoring customer feedback across various platforms.
What You Can Do with Reputation:
- Collect and display reviews from platforms like Google, Facebook, and more.
- Automate review requests to make the process easier for your clients.
- Monitor reviews and respond directly from GoHighLevel’s dashboard.
- Create automated workflows to follow up with clients after service completion for review requests.
- Track your reputation score and analyze customer feedback trends.
How to Use Reputation
To use the Reputation feature, navigate to the “Reputation” tab in your GoHighLevel dashboard. From here, you can connect your accounts on review platforms like Google or Facebook to integrate review management directly into GoHighLevel.
Once your accounts are connected, you can automate review requests. Create workflows that automatically send clients a message after completing a service, asking them to leave a review. Customize these messages to make them more personal and engaging.
You can also track and respond to reviews from within GoHighLevel’s dashboard. If a customer leaves a positive review, you can thank them, while addressing any negative reviews quickly to resolve issues and maintain a good reputation.
Additionally, GoHighLevel allows you to monitor your reputation score and track any changes in feedback over time, giving you valuable insights into your business's public perception.
Tips to Get the Best Out of Reputation:
- Respond to both positive and negative reviews promptly to show that you value customer feedback.
- Automate review requests, but make sure to personalize them to increase response rates.
- Monitor your reputation regularly to address issues before they escalate.
- Encourage happy clients to leave reviews on multiple platforms for broader visibility.
- Use reviews as testimonials in your marketing to build trust with potential clients.
Reputation is critical to attracting and retaining clients. Positive reviews can significantly boost your credibility, while negative ones, if handled poorly, can harm your business. The Reputation feature ensures you actively manage and maintain a strong, positive online presence by simplifying the review process and offering tools for monitoring and responding to customer feedback.
12. Reporting
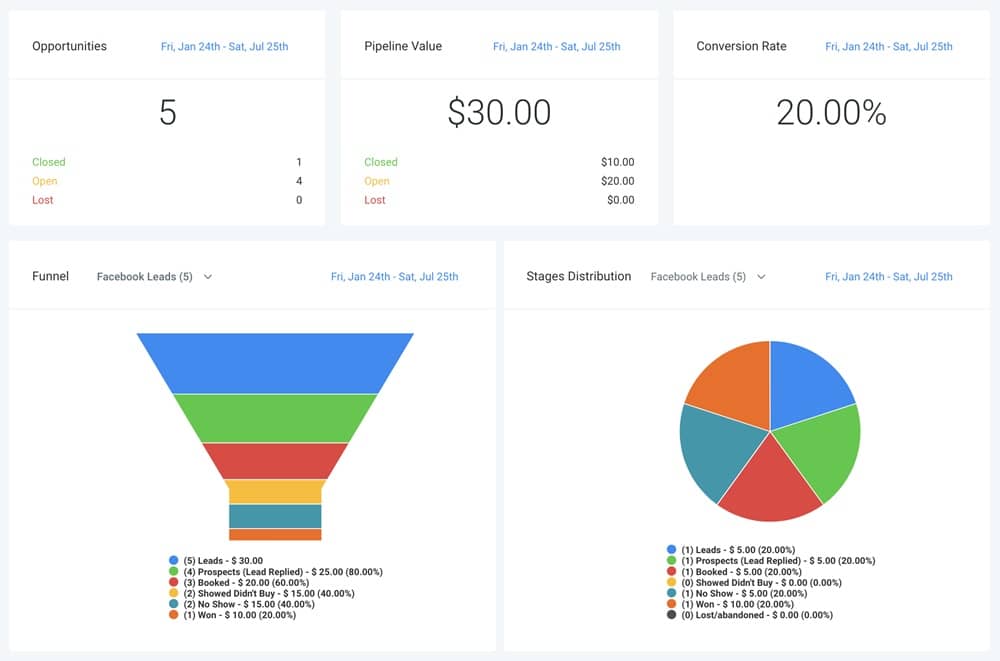
The Reporting feature in GoHighLevel provides you with detailed insights into the performance of your campaigns, automations, sales processes, and more.
It helps you analyze data, track key metrics, and make informed decisions to grow your business.
What You Can Do with Reporting:
- Generate reports for campaigns, sales, marketing, and automations.
- Track key performance indicators (KPIs) like conversion rates, open rates, and sales performance.
- Analyze lead and client behavior to optimize your strategies.
- Create custom reports to focus on specific metrics relevant to your business.
- Share reports with your team or clients to provide transparency and showcase results.
How to Use Reporting
To start using the Reporting feature, go to the “Reporting” tab in your GoHighLevel dashboard. Here, you'll see a variety of default reports, such as campaign performance, lead activity, and sales metrics.
You can filter the reports by date range, specific campaigns, or other criteria to narrow down the data.
If you need a more specific view, you can create a custom report by selecting the metrics that matter most to your business.
For example, you can create a report that tracks email open rates or automations performance over a given time period.
Once your report is generated, you can view detailed charts, graphs, and data tables that illustrate how your efforts are performing. You can also export the reports to share with clients or internal team members.
Tips to Get the Best Out of Reporting:
- Regularly review your reports to track the effectiveness of your campaigns and identify areas for improvement.
- Set up automated reporting to receive updates on your key metrics at regular intervals.
- Use split testing results from campaigns to refine strategies based on data insights.
- Focus on the KPIs that directly impact your business goals, such as sales growth, lead conversion, or customer retention.
- Share reports with your team to align on performance and collaborate on improvements.
Reporting is essential for understanding the impact of your efforts and making data-driven decisions. By consistently tracking performance across different areas of your business, you can optimize your strategies, improve results, and demonstrate the effectiveness of your work to clients.
13. App Marketplace
The App Marketplace in GoHighLevel is a hub where you can discover and integrate third-party apps and services to extend the functionality of your platform.
What You Can Do with App Marketplace:
- Browse and install third-party apps to add new features to your GoHighLevel account.
- Integrate your favorite apps for enhanced business workflows (e.g., email marketing tools, payment processors, CRMs).
- Access a wide range of tools that can help with lead generation, customer management, analytics, and more.
- Connect apps that work seamlessly with GoHighLevel to streamline operations and boost productivity.
- Get updates and improvements on apps directly from the Marketplace.
How to Use App Marketplace
To use the App Marketplace, go to the “App Marketplace” tab in your GoHighLevel dashboard. Here, you’ll see a variety of apps categorized by functionality (e.g., communication, marketing, integrations, etc.).
You can browse through the available options or use the search bar to find specific apps you need.
Once you find an app that fits your needs, click on it to view more details and follow the instructions to install it.
Some apps may require you to sign up for an external account or API keys, while others might be plug-and-play.
After installation, you can start using the app’s features directly from within GoHighLevel. For example, you might install a payment processor app, which will allow you to accept payments on your landing pages or through your automations.
Tips to Get the Best Out of App Marketplace:
- Regularly check the App Marketplace for new tools or updates to existing apps that could enhance your business.
- Focus on integrating apps that streamline your workflows and enhance your existing processes.
- Read reviews and check ratings for apps before installing them to ensure they meet your needs.
- Use app integrations to create seamless workflows and avoid having to switch between multiple platforms.
- Stay updated with any changes in app pricing or features to ensure you’re always using the most effective tools.
The App Marketplace is essential for extending GoHighLevel’s capabilities beyond its core features. It allows you to customize your platform according to your business needs, ensuring you have all the tools you need in one place.
14. Settings
The Settings feature in GoHighLevel allows you to customize the platform to match your business needs, manage user permissions, and configure system-wide settings for optimal performance.
What You Can Do with Settings:
- Adjust account settings, such as company name, logo, and branding.
- Set up email and SMS notifications for various platform activities.
- Manage user roles and permissions to control access to different features.
- Configure integrations with third-party services, such as payment processors and CRMs.
- Set up payment gateways, tax settings, and currency preferences.
- Customize your workflows and automations to fit your business processes.
How to Use Settings
To access the Settings feature, go to the “Settings” tab in your GoHighLevel dashboard. In this area, you’ll find several categories for customizing the platform according to your business requirements.
Start by updating your company information, such as your business name, logo, and contact details, to ensure your GoHighLevel account reflects your brand. Next, set up email and SMS templates for automatic communication with clients and leads, such as confirmation emails or reminders.
In the “User Management” section, you can add team members and assign them specific roles, such as admin or user. This helps you control who has access to certain features, ensuring your business operations run smoothly.
For integrations, go to the “Integrations” section to connect your GoHighLevel account with other tools, such as payment processors, email marketing platforms, or customer management systems. This ensures a seamless flow of data between platforms.
Finally, in the “Payment Settings” section, you can configure your payment gateways, set up taxes, and choose your preferred currency. This is especially useful if you plan to accept payments directly through GoHighLevel.
Tips to Get the Best Out of Settings:
- Regularly review and update your settings as your business evolves, ensuring that everything remains accurate and up to date.
- Use user roles to limit access to sensitive information, ensuring only authorized team members can make changes to critical settings.
- Take the time to customize your email and SMS templates for a personalized experience that aligns with your brand voice.
- Explore the integrations section to connect GoHighLevel with any other tools you're using to maximize automation and efficiency.
- Be mindful of your payment settings, ensuring your pricing, taxes, and currencies are correctly configured to avoid issues with transactions.
The Settings feature is crucial for tailoring GoHighLevel to your business needs and ensuring that all processes are running smoothly. From branding to automation to integrations, your settings determine how efficiently and effectively your team and tools can work together.
Frequently Asked Questions
Do I need prior technical experience to use GoHighLevel?
No, you don’t need technical expertise to get started with GoHighLevel. The platform is designed to be user-friendly, with simple drag-and-drop features and customizable templates. GoHighLevel also provides tutorials and support to guide you along the way.
Is GoHighLevel suitable for beginners?
Yes, GoHighLevel is beginner-friendly, and it’s designed to help new users set up and manage their marketing efforts easily. With step-by-step guidance, tutorials, and a user-friendly interface, even beginners can use GoHighLevel to run their business operations.
How do I get support if I need help with GoHighLevel?
GoHighLevel offers multiple support options, including a knowledge base, tutorial videos, and a support ticket system. You can also reach out to their customer support team directly for assistance with any issues or questions you may have.
Can I manage my clients from GoHighLevel?
Yes, GoHighLevel allows you to manage your client interactions, appointments, communication, and campaigns all from one platform. The “Conversations” feature allows you to manage client messages, and you can track their journey through your sales pipeline.
Can I use GoHighLevel to manage my reputation online?
Yes, the Reputation feature in GoHighLevel allows you to track and manage online reviews from platforms like Google and Facebook. You can automate review requests and respond to feedback, helping you maintain a positive online reputation.
Is there a mobile app for GoHighLevel?
Yes, GoHighLevel offers a mobile app that allows you to manage your business on the go. You can access key features like conversations, appointments, and campaigns from your mobile device, ensuring you're always connected with your business.
Final Thoughts
GoHighLevel is a comprehensive platform that provides all the tools you need to manage, grow, and scale your business, whether you're a beginner or an experienced user.
From automating marketing and managing client relationships to organizing your media and tracking your reputation, GoHighLevel makes it easier to streamline your operations and achieve better results.
By exploring and mastering the features covered in this guide – Launchpad, Dashboard, Conversations, Calendars, Payments, Marketing, Automation, Site, Membership, Media Storage, Reputation, Reporting, App Marketplace, and Settings – you’ll be well on your way to building a solid foundation for your business.
Whether you’re just getting started or looking to enhance your existing processes, GoHighLevel offers powerful solutions that can help you take your business to the next level.